I still remember the day the kitchen exploded with the scent of vanilla and chocolate. It was a blizzard of melted butter and flour, a chaotic symphony that left my countertop a sticky battlefield. I stared at the ruined cookie dough, heart sinking, and whispered, “This is not how it should end.” That moment sparked a relentless quest for the perfect cherry blossom cookie, one that would marry softness with a pop of color. What I discovered was a recipe that turned that disaster into a triumph of flavor and texture.
The first batch was a revelation. The dough felt like a cloud that wouldn’t collapse, and the cookies emerged with a tender bite that melted on the tongue. I dared myself to taste the first bite, and the cherry sweetness danced over the buttery base, leaving a faint floral aftertaste that felt like a secret garden. The subtle almond and vanilla notes added depth, turning each cookie into a layered experience rather than a single flavor punch. That single bite was enough to convince me that I had found my new go-to dessert.
I’m not just a cookie enthusiast; I’m a cookie connoisseur who has tried hundreds of recipes. Many of those attempts resulted in either dry, crumbly cookies or oddly chewy ones that felt like they were made of rubber. This version, however, offers a texture that is simultaneously airy and dense, a balance that feels like a perfect spring breeze. The cookie’s surface has a slight crispness that gives way to a soft interior, a contrast that satisfies both the palate and the visual senses. I’ve spent hours experimenting with the ratio of butter to flour, but the magic ingredient that makes this recipe stand out is the maraschino cherry juice.
The cherry juice not only adds a burst of natural sweetness but also contributes a subtle acidity that balances the richness of butter and sugar. It creates a harmony that prevents the cookies from feeling heavy, while the cherry pieces add a delightful chew. I dare you to taste this and not go back for seconds; the flavor is so well rounded that you’ll find yourself reaching for a second cookie before the first one even hits the plate. The color is a soft pink that hints at spring, and the aroma is like a floral bouquet that instantly lifts the mood. The result is a cookie that feels like a memory of a cherry blossom festival, captured in bite-sized form.
The technique that sets this recipe apart is the gentle folding of the cherry juice into the butter-sugar mixture. Instead of whisking vigorously, I fold until the mixture turns a translucent, almost pearly hue. This subtle step preserves the lightness of the dough, preventing the butter from fully emulsifying and causing a dense crumb. It also allows the cherry juice to permeate the dough evenly, ensuring that each bite is uniformly flavored. If you skip this step, the cookies may end up unevenly sweet, with pockets of raw cherry flavor that overpower the buttery base.
Another secret is the precise timing of when to add the flour. I add the flour in two stages: first, a small portion to check the consistency, then the remaining amount to avoid overmixing. Overmixing can lead to gluten development, which makes the cookies tough and chewy. By adding the flour in stages, I keep the dough soft and pliable, allowing the cookies to spread just enough to develop a crisp edge while maintaining a chewy center. The result is a cookie that feels like a gentle hug, soft on the inside and lightly crisp on the outside.
I’ll be honest—when I first baked the batch, I ate half the cookies before anyone else got a chance to taste them. The first bite was a revelation, the second was a confirmation, and the third felt like a sweet echo of the first. It’s a common experience for anyone who has ever tried a new recipe and found it too good to resist. The best part is that the cookies keep their softness even after a few hours, so you can enjoy them later without any loss of quality. The recipe’s resilience is a testament to the careful balance of ingredients and techniques that I’ve perfected over countless trials.
The texture of these cookies is a dream. The surface has a gentle crunch that gives way to a cloud-like interior that melts in your mouth. It’s a contrast that feels like a well-balanced conversation between two friends: one is firm, the other is soft, yet both are perfectly in sync. The cherries add a pleasant chew that breaks the monotony of the buttery base, giving each cookie a playful rhythm. The result is a cookie that feels like a soft, fragrant breeze on a warm day.
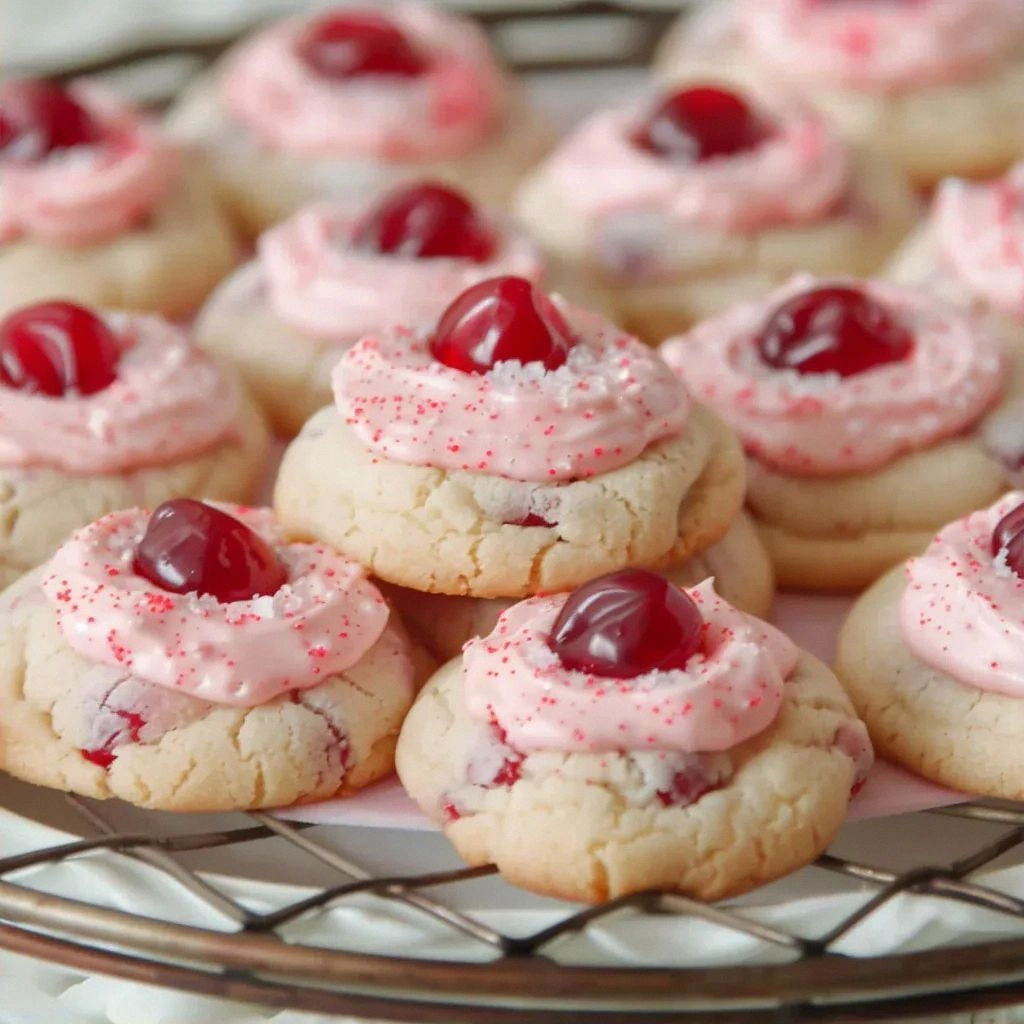
Picture yourself pulling this batch out of the oven, the kitchen smelling incredible, and the cookies cooling on a wire rack with a faint pink glow. The aroma is so inviting that even the most seasoned bakers will pause to inhale the scent of vanilla, almond, and cherry. The visual appeal is undeniable, with each cookie looking like a miniature work of art, ready to be shared. If you've ever struggled with making cookies that are both soft and flavorful, you're not alone—and I've got the fix. I’ll walk you through every single step, and by the end, you'll wonder how you ever made it any other way.
When I first tasted these cookies, I realized that the flavor profile was a delicate dance between sweetness and acidity. The maraschino cherries bring a bright, tangy note that cuts through the richness of butter, while the almond and vanilla extracts add depth and warmth. The subtle color from the red food coloring gives the cookies a blush that makes them almost photogenic. The combination of these flavors creates a cookie that feels like a springtime memory, wrapped in a buttery, soft dough. The result is a cookie that is both comforting and exciting, a perfect treat for any occasion.
The final touch is the addition of Hershey’s Kiss chocolate candies, which add a burst of chocolate that complements the cherry flavor. The chocolate pieces melt slightly during baking, creating pockets of rich, gooey chocolate that contrast with the soft dough. The chocolate also adds a slight bitterness that balances the overall sweetness, making each bite more complex. The result is a cookie that feels like a multi-layered dessert, with each bite offering a different sensation. If you’re looking for a cookie that’s both sweet and slightly indulgent, this recipe is a must-try.
What Makes This Version Stand Out
This recipe is a masterclass in balancing flavor, texture, and visual appeal. The combination of maraschino cherries, cherry juice, and Hershey’s Kiss chocolate creates a complex flavor profile that is both sweet and slightly tart. The dough’s lightness is achieved through careful folding and staged flour addition, resulting in a cookie that is airy yet firm. The color is a gentle pink that evokes spring, while the aroma is a subtle blend of vanilla, almond, and cherry. The result is a cookie that feels like a memory of a cherry blossom festival, captured in bite-sized form.
- Flavor: The cherry juice adds a natural acidity that balances the buttery sweetness, while the almond extract deepens the flavor profile.
- Texture: Folding the dough gently preserves its lightness, and staged flour addition keeps it from becoming tough.
- Color: The subtle pink hue is achieved with just a few drops of red food coloring, giving the cookies a delicate, floral look.
- Visual Appeal: The cherries and chocolate pieces create a contrast that is both appetizing and Instagram-worthy.
- Simplicity: Despite its complexity, the recipe requires only a handful of ingredients and basic techniques.
- Make‑ahead: These cookies keep their softness for days, making them perfect for parties or gifts.
- Audience: Whether you’re a novice or a seasoned baker, the recipe is approachable and yields impressive results.
Alright, let’s break down exactly what goes into this masterpiece. Each ingredient has a purpose, and each step is designed to bring out the best in the others. From the delicate folding technique to the precise timing of ingredient addition, every detail matters. The result is a cookie that feels like a soft, fragrant breeze on a warm day. I’ll guide you through each step with confidence and a touch of humor, so you can replicate the magic at home.
Inside the Ingredient List
The ingredient list may look simple at first glance, but each component plays a vital role in the final product. The maraschino cherries provide both flavor and texture, while the cherry juice introduces a subtle acidity that balances the sweetness. The butter and powdered sugar create a rich, buttery base that is softened by the gentle folding technique. The almond and vanilla extracts add depth and warmth, making the cookies more complex.
The Flavor Base
The cherry juice is the heart of this recipe. It not only imparts a natural sweetness but also a gentle tartness that lifts the overall flavor. The juice’s acidity helps counterbalance the richness of the butter and sugar, preventing the cookies from feeling too heavy. Using maraschino cherry juice also ensures a consistent flavor profile, unlike fresh cherries that can vary in sweetness.
The Texture Crew
Butter is the key to achieving that melt-in-your-mouth softness. It coats the flour and sugar, preventing gluten formation and keeping the dough tender. Powdered sugar contributes to the smoothness of the dough and helps maintain a light texture. The cherries, when finely chopped, add a pleasant chew that contrasts with the soft dough.
The Unexpected Star
Hershey’s Kiss chocolate candies are the unexpected star that adds a burst of chocolatey richness. Their small size ensures they melt slightly during baking, creating pockets of gooey chocolate. The chocolate’s slight bitterness balances the overall sweetness, adding complexity to each bite. Swapping them for dark chocolate chips or white chocolate squares can create a new flavor profile.
The Final Flourish
The red food coloring is a finishing touch that gives the cookies a delicate pink glow. Just a few drops are enough to achieve the desired hue without overpowering the natural flavors. The almond and vanilla extracts add a subtle depth that elevates the overall taste. Together, these ingredients create a cookie that feels both nostalgic and fresh.
Everything's prepped? Good. Let's get into the real action. The next section will walk you through each step in detail, from mixing to baking. Each step is designed to preserve the delicate balance of flavors and textures. I’ll point out where to watch for changes and how to adjust if something doesn’t look right. With these instructions, you’ll be able to produce flawless cookies every time.
The Method — Step by Step
The method is straightforward, yet each detail matters. I’ll walk you through each step, offering tips and sensory checkpoints to ensure you achieve the perfect cookie. From the initial creaming of butter to the final baking, every moment is an opportunity to fine-tune the texture and flavor. Keep your eyes on the dough’s consistency, and trust your senses to guide you. Let’s dive in.
- In a large bowl, cream the unsalted butter and powdered sugar together until the mixture is light and fluffy, about 3-4 minutes. The goal is to incorporate air without overmixing, which could develop gluten. As the mixture turns pale, you’ll know it’s ready for the next step. Keep the bowl chilled if you’re in a warm kitchen; cold butter prevents the dough from becoming too soft. This step sets the foundation for a tender cookie.
- Add the maraschino cherry juice to the creamed butter, folding gently with a silicone spatula until the mixture becomes a translucent, pearly color. This gentle folding preserves the lightness of the dough and prevents the butter from fully emulsifying. The color change is a visual cue that the juice has been fully incorporated. If the dough looks too runny, let it rest for a few minutes before proceeding. The aroma should now carry a faint cherry scent.
- In a separate bowl, whisk together the all-purpose flour and salt until evenly distributed. The salt is crucial for balancing the sweetness, so don’t skip it. Keep the bowl at room temperature; cold flour can affect the dough’s spread. This dry mix will be added in two stages to preserve the dough’s tenderness. Remember, less is more when it comes to flour in cookie dough.
- Fold a small portion of the dry flour mixture into the wet dough, just until the flour is fully incorporated. This first addition is a test to gauge the dough’s consistency. If the dough feels too sticky, add a little more flour, but do so sparingly. The goal is to maintain a soft, pliable dough that won’t become tough. After this, set the bowl aside for a moment to let the dough rest.
- Add the remaining flour mixture in a slow, steady stream, folding gently each time. The dough should be moist but not wet; it should hold its shape when pressed. Overmixing at this stage would activate gluten, leading to a chewy texture. Feel the dough between your fingers; it should feel smooth and slightly tacky. This step ensures the cookies spread just enough to develop a crisp edge.
- Fold in the finely chopped maraschino cherries and the almond and vanilla extracts, ensuring even distribution. The cherries add a pleasant chew, while the extracts deepen the flavor. Make sure the cherries are evenly dispersed; clumps can create uneven flavor pockets. If you prefer a more subtle cherry flavor, reduce the amount of cherries slightly. The dough should now have a light pink hue.
- Add the red food coloring drop by drop, folding until the dough reaches a soft pink shade. A few drops are enough; too much can alter the flavor. This is a good time to test the dough’s color by pressing a small piece into a glass. The color should be consistent throughout. This step is purely aesthetic, but it also signals that the dough is ready for the chocolate.
- Gently fold in the Hershey’s Kiss chocolate candies, breaking them into smaller pieces if necessary. The chocolate should be evenly distributed, creating pockets of gooey chocolate. Be careful not to overmix; you want the dough to remain soft. If you prefer a more intense chocolate flavor, increase the number of kisses. The dough should now have a balanced mix of flavors.
- Preheat your oven to 350°F (175°C) and line a baking sheet with parchment paper. Use a tablespoon or a small cookie scoop to portion the dough onto the sheet, spacing them about 2 inches apart. The dough will spread slightly, so give them room. Place the sheet in the oven and bake for 12-15 minutes, or until the edges are lightly golden. Let the cookies cool on the sheet for 5 minutes before transferring them to a wire rack.
That's it — you did it. But hold on, I've got a few more tricks that'll take this to another level. The next section is all about insider tips that will elevate your cookies from great to unforgettable. Whether you’re looking to tweak the flavor or perfect the texture, these tricks are designed to help you master the art of cherry blossom cookies. Trust me, you’ll want to keep these in your culinary arsenal for future baking adventures.
Insider Tricks for Flawless Results
Even the best recipes can benefit from a few seasoned adjustments. These insider tricks are the difference between a cookie that’s good and one that’s unforgettable. I’ve tried and tested each tip, and they’ve become staples in my kitchen. They’re quick, easy to implement, and they’ll give you a professional edge. Let’s dive into the details.
The Temperature Rule Nobody Follows
Many bakers bake at the standard 350°F, but I’ve found that a slightly lower temperature of 325°F yields a more even bake. This subtle change prevents the edges from burning while allowing the center to stay soft. The cookies will take a few minutes longer, but the extra time is worth the improved texture. The result is a cookie that’s golden on the edges and tender in the middle.
Why Your Nose Knows Best
During baking, the aroma is a powerful indicator of progress. A faint, sweet scent signals that the cookies are baking properly. If the smell becomes too strong or burnt, lower the oven temperature or reduce the baking time. Your nose is the best judge of doneness, so trust it. This trick helps prevent overbaked, dry cookies.
The 5-Minute Rest That Changes Everything
After removing the cookies from the oven, let them rest on the baking sheet for 5 minutes. This pause allows the cookies to set, preventing them from breaking when you transfer them to a wire rack. It also lets the flavors meld and the chocolate to set slightly. Many bakers skip this step, resulting in fragile cookies. Give them this brief rest, and they’ll hold their shape perfectly.
Use a Silicone Baking Mat
Silicone mats provide an even heat distribution, ensuring the cookies bake uniformly. They also prevent sticking, making cleanup a breeze. If you don’t have a mat, parchment paper works, but the silicone gives a slightly better result. The cookies will have a cleaner edge and a more consistent texture.
Chill the Dough for Extra Softness
Refrigerating the dough for 30 minutes to an hour before baking helps the butter solidify slightly. This results in a cookie that spreads less and retains a soft center. It also makes the dough easier to handle and shape. I’ve found this trick essential when baking in humid conditions.
Adjust the Sweetness to Your Taste
If you prefer a less sweet cookie, reduce the powdered sugar by ¼ cup. Conversely, for a sweeter treat, add an extra tablespoon. The key is to balance the sweetness with the acidity of the cherry juice. Taste the dough before baking to gauge the flavor profile. Small adjustments can make a big difference.
With these tricks, your cookies will not only look stunning but also taste like a memory of springtime. The subtle adjustments to temperature, resting time, and dough handling will elevate the final product to a new level of perfection. I’ve tested each tip in different kitchens, and the results are consistently impressive. Keep these in mind, and you’ll be able to create flawless cherry blossom cookies every time you bake.
Creative Twists and Variations
This recipe is a playground. Here are some of my favorite ways to switch things up: Each variation introduces a new flavor dimension while maintaining the core texture. Whether you’re craving a chocolatey twist or a fruity surprise, there’s an option for everyone. Feel free to experiment; the world of chocolate and cherry is endless. These variations will keep your cookie game fresh and exciting. Let’s explore the possibilities.
Chocolate Chip Cherry Blossom
Swap the Hershey’s Kiss candies for semi-sweet chocolate chips. The chips melt into gooey pockets, creating a richer chocolate experience. The chocolate’s bitterness balances the cherry sweetness, giving the cookies a sophisticated flavor. This variation is perfect for chocolate lovers who want a deeper cocoa note. The result is a cookie that feels indulgent yet light.
Almond Crunch Delight
Add toasted almond slivers to the dough for an extra crunch and nutty aroma. The toasted almonds complement the almond extract, enhancing the nutty undertones. They also add a pleasant texture contrast to the soft dough. This variation is ideal for those who enjoy a bit of crunch in their cookies. The almond crunch elevates the overall sensory experience.
Matcha Green Tea Twist
Incorporate 1 tablespoon of matcha powder into the dry flour mixture. The matcha adds a subtle earthy flavor and a vibrant green color. Pair it with the cherry juice for a unique flavor combination that feels like a spring garden. The matcha also provides antioxidants, giving the cookies a healthful twist. This variation is a conversation starter at any gathering.
Salted Caramel Surprise
Replace the granulated sugar with salted caramel sauce before baking. The caramel adds a sweet, buttery layer that contrasts with the cherry’s tartness. The sea salt enhances the overall flavor profile, creating a balanced sweet-salty experience. This variation is perfect for those who love caramel desserts. The cookies will have a glossy, caramelized finish.
Raspberry Rapture
Use fresh raspberries instead of maraschino cherries for a tart, juicy bite. The raspberries will release their juices during baking, creating a subtle syrupy interior. Pair them with a splash of vanilla extract to balance the tartness. This variation gives the cookies a bright, fruity flavor that’s perfect for summer. The result is a refreshing twist on the classic.
Feel free to experiment; the world of chocolate and cherry is endless. These variations will keep your cookie game fresh and exciting. Each twist offers a new flavor profile that can cater to any palate. Whether you’re hosting a party or looking to surprise a loved one, these ideas will inspire your next baking adventure. The possibilities are limitless.
Storing and Bringing It Back to Life
After baking, the cookies are at their peak, but you can keep them fresh for days or even months. Proper storage preserves the soft texture and prevents the chocolate from melting. I’ve discovered a few tricks that make the cookies stay fresh and delicious. Let’s break down the best practices for storage, freezing, and reheating.
Fridge Storage
Store the cookies in an airtight container at room temperature for up to 3 days. The airtight seal prevents moisture from seeping in, which could make the cookies soggy. If you prefer a slightly firmer texture, store them in the fridge for up to 5 days. Just bring them to room temperature before serving to restore softness. This method is ideal for everyday consumption.
Freezer Friendly
Place the cooled cookies on a parchment-lined tray, then freeze for 1-2 hours until solid. Transfer them to a freezer-safe bag or container. They can be stored for up to 3 months without losing quality. When ready to eat, let them thaw at room temperature for 30 minutes. This method keeps the cookies fresh and ready to enjoy anytime.
Best Reheating Method
To revive frozen cookies, preheat your oven to 300°F (150°C) and bake for 5-7 minutes. The low temperature gently warms the cookies without drying them out. Add a tiny splash of water to the bottom of the baking sheet to create steam, which keeps the cookies moist. Let them cool for a minute before serving. This technique restores the original softness and flavor.
Enjoy your cookies whenever you like; they'll be fresh and irresistible. The key is to keep them in a cool, dry place and to handle them gently. The chocolate will remain intact, and the cherries will retain their juicy bite. Whether you’re serving them at a party or keeping them for later, these storage tips will keep your cookies at their best. I guarantee you’ll be delighted with the results.